
The steps to add a new cultivar line to DSSAT can be a confusing process if you are new to DSSAT or have never had DSSAT training. We will guide you through this process in the steps below.
Step #1:
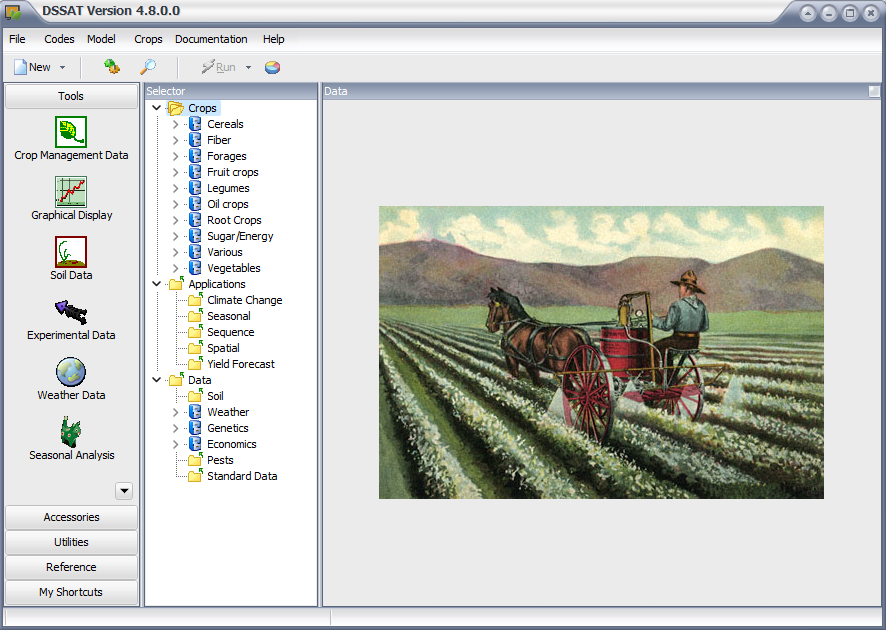
Open the DSSAT Shell as shown in Figure 1.
Step #2:
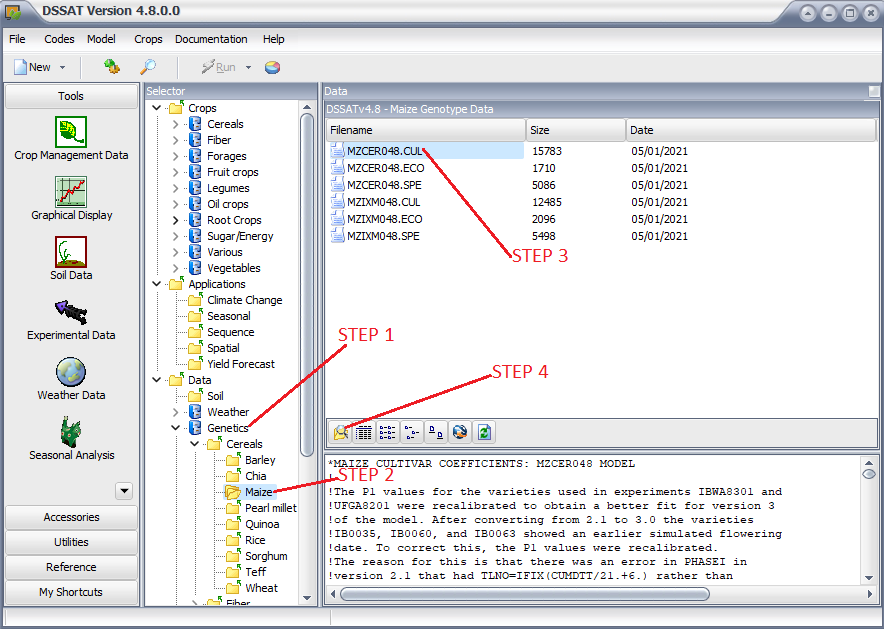
Follow the steps in Figure 2, where:
- STEP 1: Click in the Genetics to open all genotype files for all models
- STEP 2: Select your working crop
- STEP 3: Select the model and the specific genotype file.
- STEP 4: Click in the icon to edit the file with Notepad.
Step #3:
Follow the steps in Figure 3, where:
- STEP 1: Check the name of the file if corresponds the genotype you want to add a new cultivar.
- STEP 2: Scroll down and find the data. The data for the cultivar is always after the lines started with @VAR#.
- STEP3: Add a “unique and 6 character” cultivar code for your cultivar line.
- STEP 4: Add a short cultivar description. Maximum of 16 characters.
- STEP 5: Add your cultivar coefficients. Note that you need to align all the columns with the other lines. Look PC0005 and NEW001 they have the same column alignment.
- STEP 6: Save the file.
- STEP 7: Close the file.

Step #4:
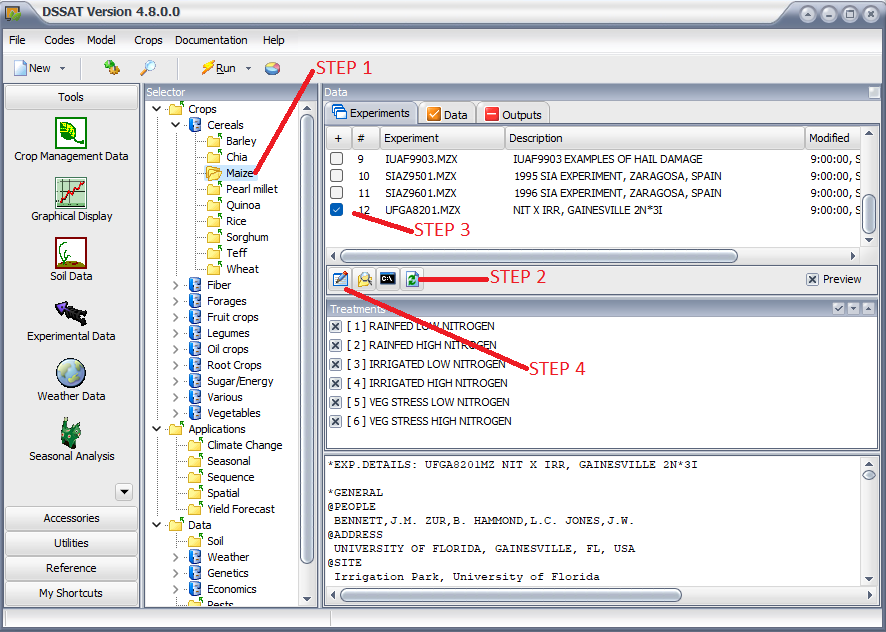
Follow the steps in Figure 4, where:
- STEP 1: Select your working Crop.
- STEP 2: Refresh the file.
- STEP 3: Select your experiment.
- STEP 4: Click in the icon to Edit the experimental file and open XBUILD.
Step #5:
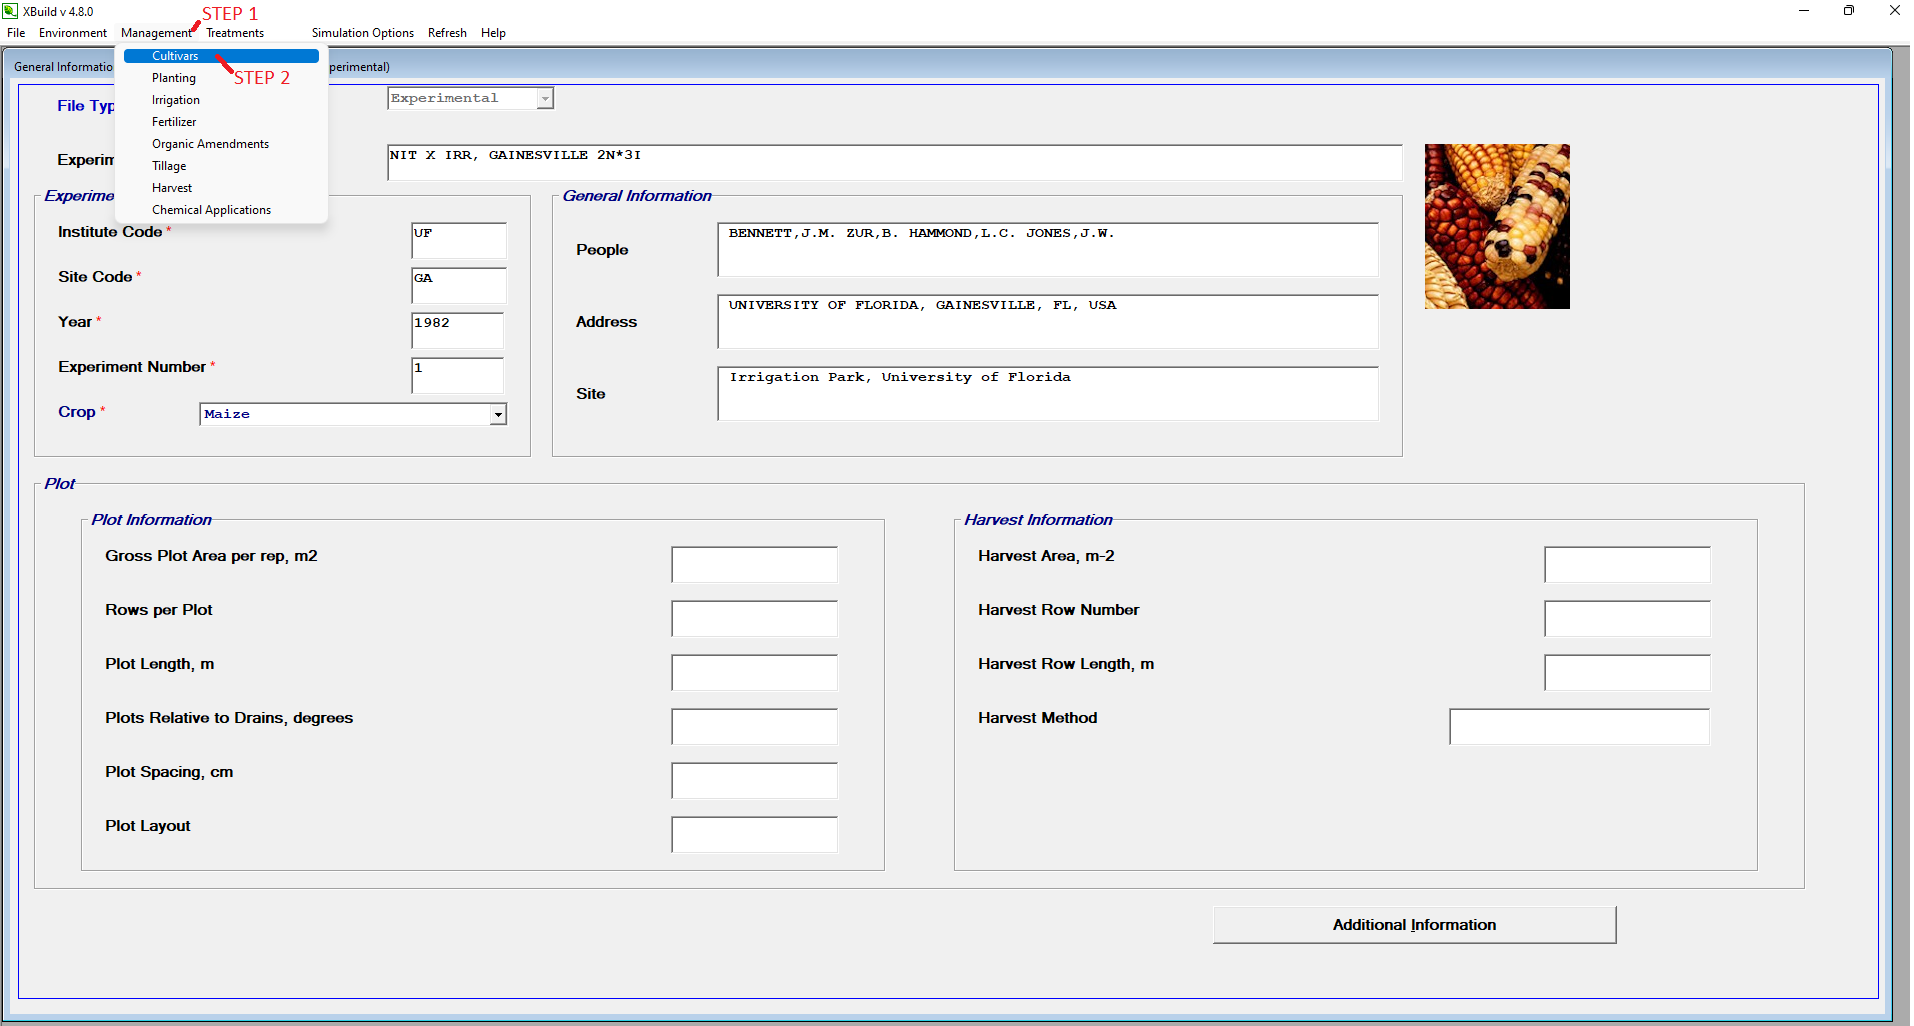
Follow the steps in Figure 5, where:
- STEP 1: Click in the Management drop down.
- STEP 2: Click and select the Cultivar section.
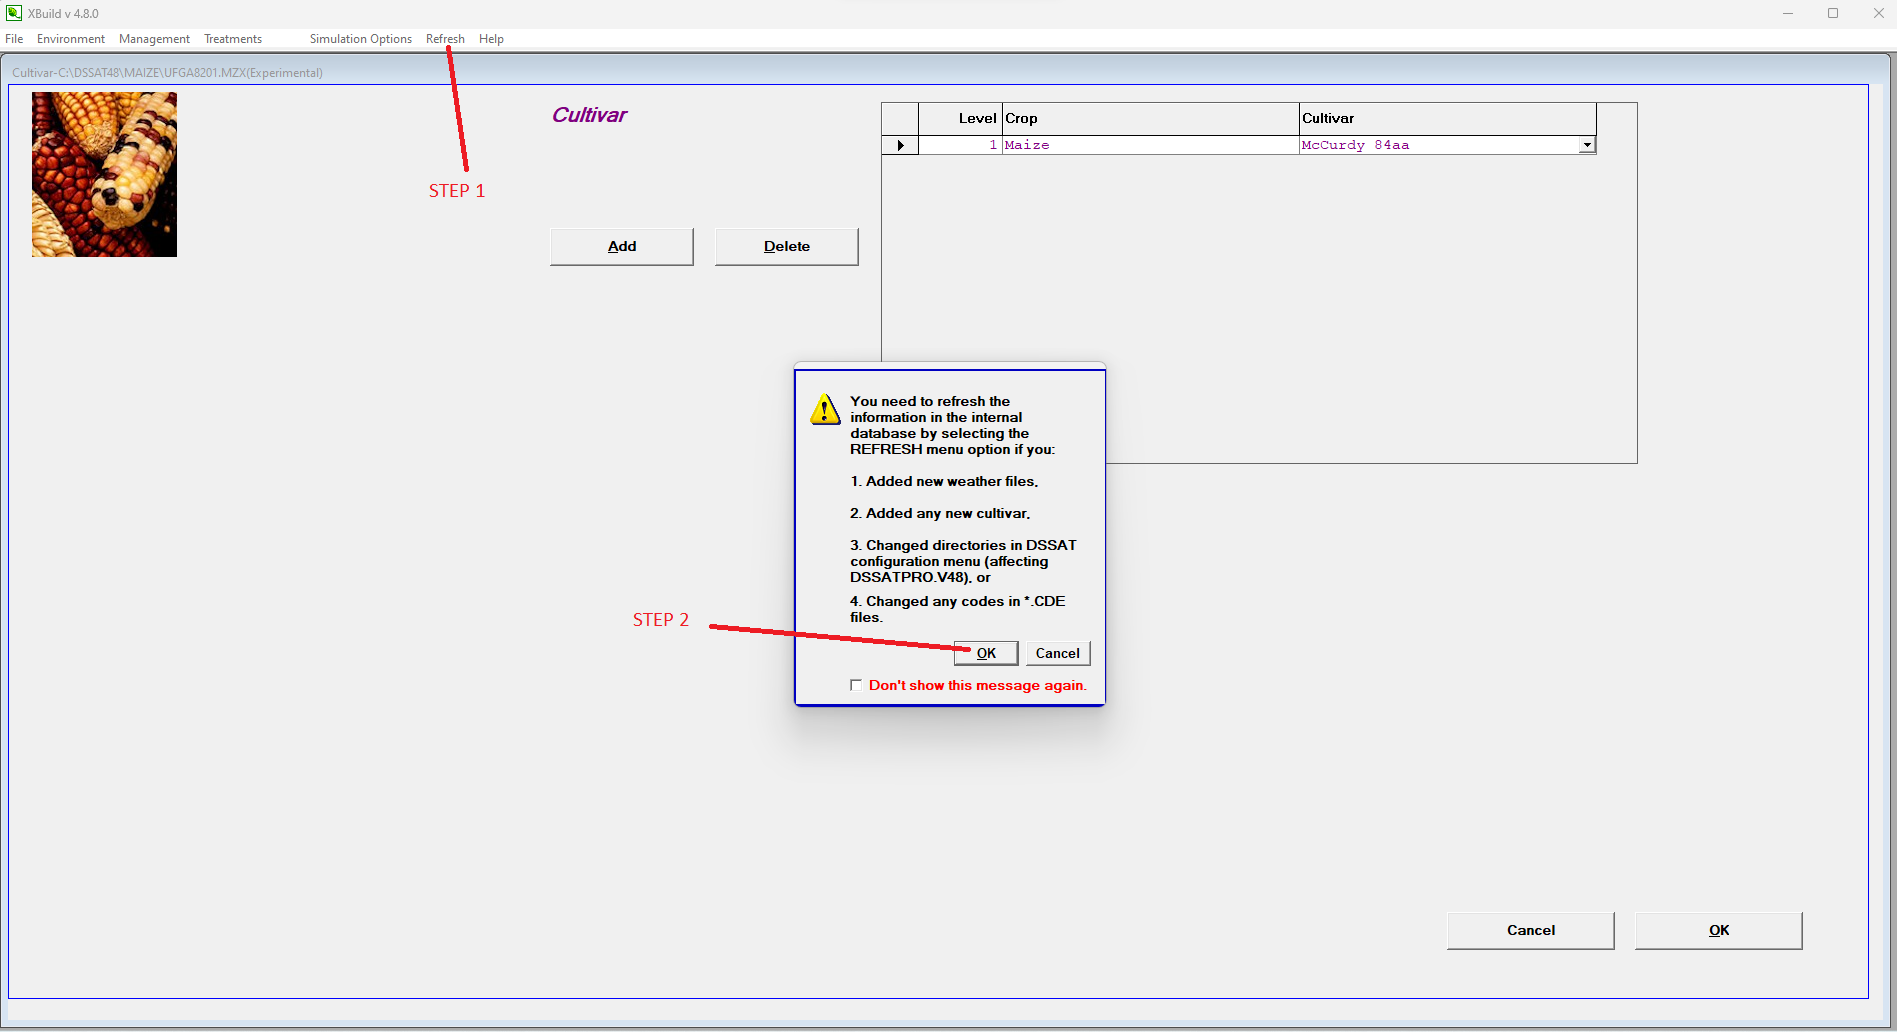
IMPORTANT: You may need to follow the steps in Figure 6, if you are still not able to find your cultivar, where:
- STEP 1: Click in the REFRESH.
- STEP 2: Click in OK to refresh the cultivar lines.
Step #7:
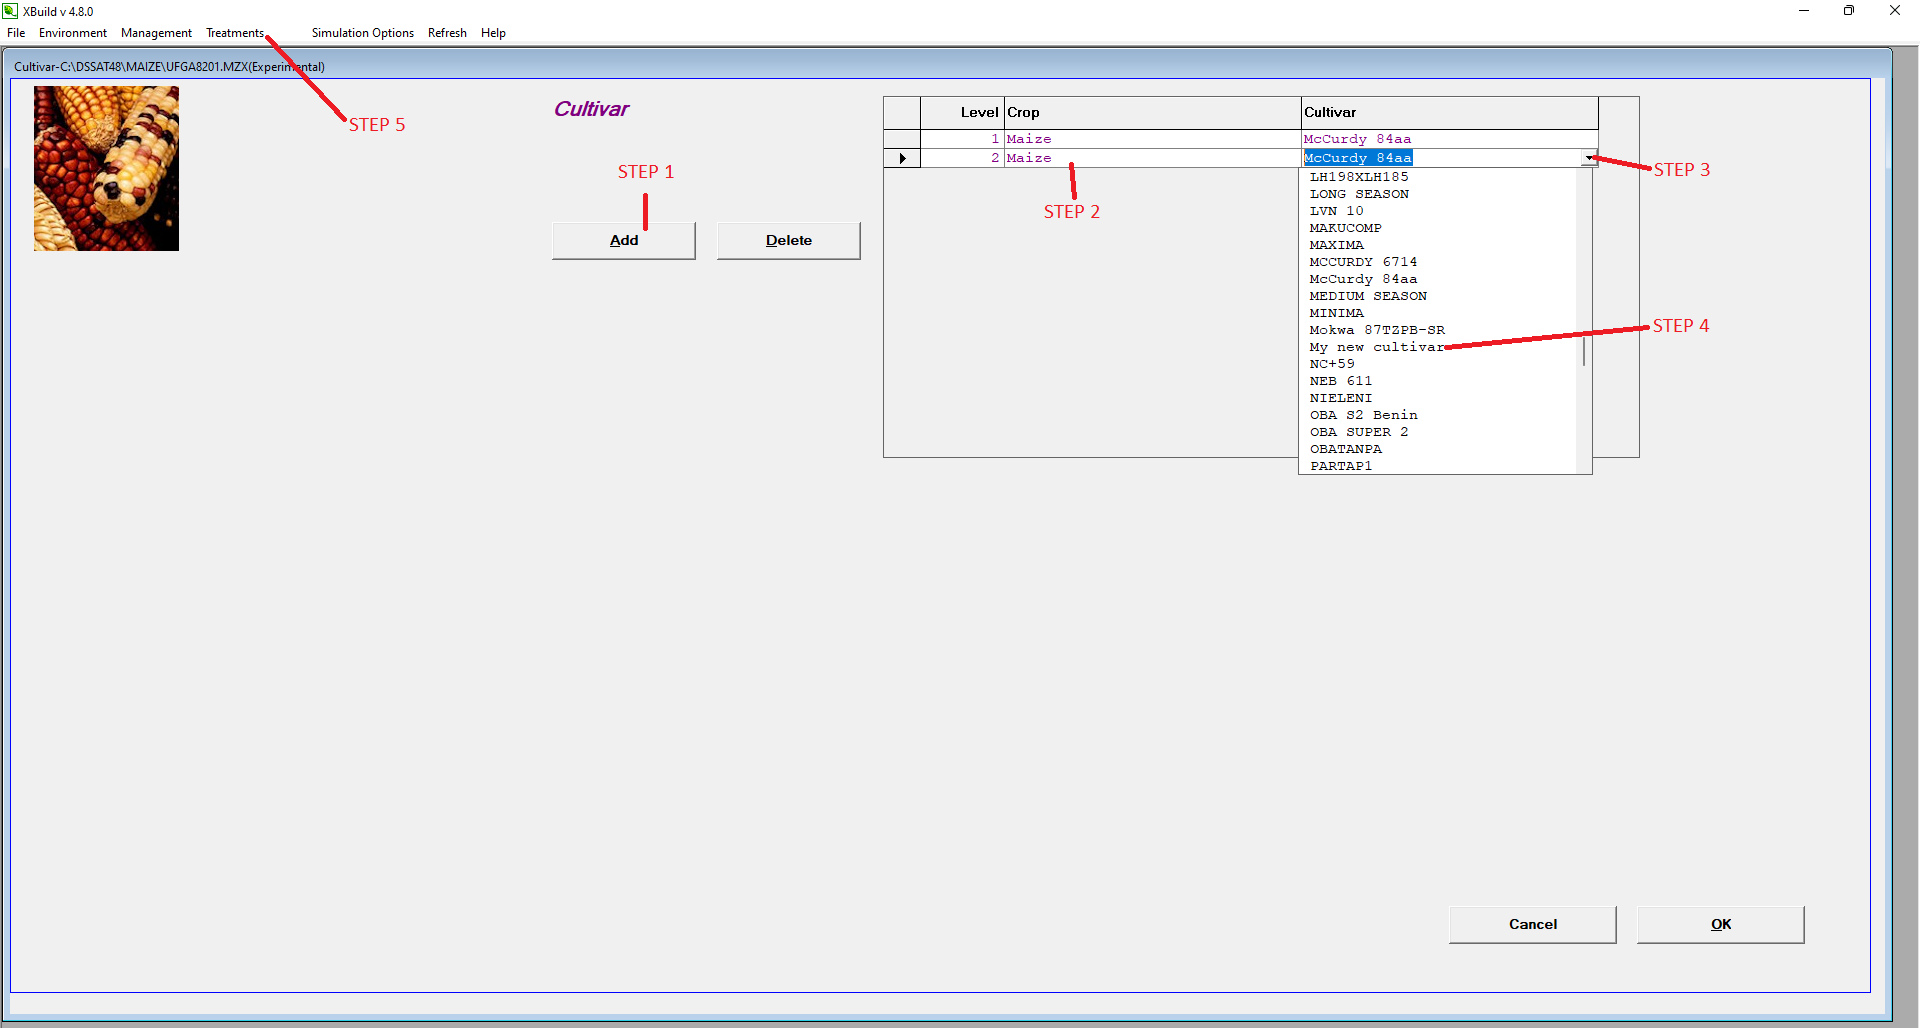
Follow the steps in Figure 7, where:
- STEP 1: Click in Add. If you do not want to edit an existing cultivar.
- STEP 2: Select your working crop.
- STEP 3: Open the cultivar drop down selector.
- STEP 4: Find your cultivar line. Note that you need to search for your Cultivar description and not the cultivar code.
- STEP 5: Go to treatments section.
Step #8:
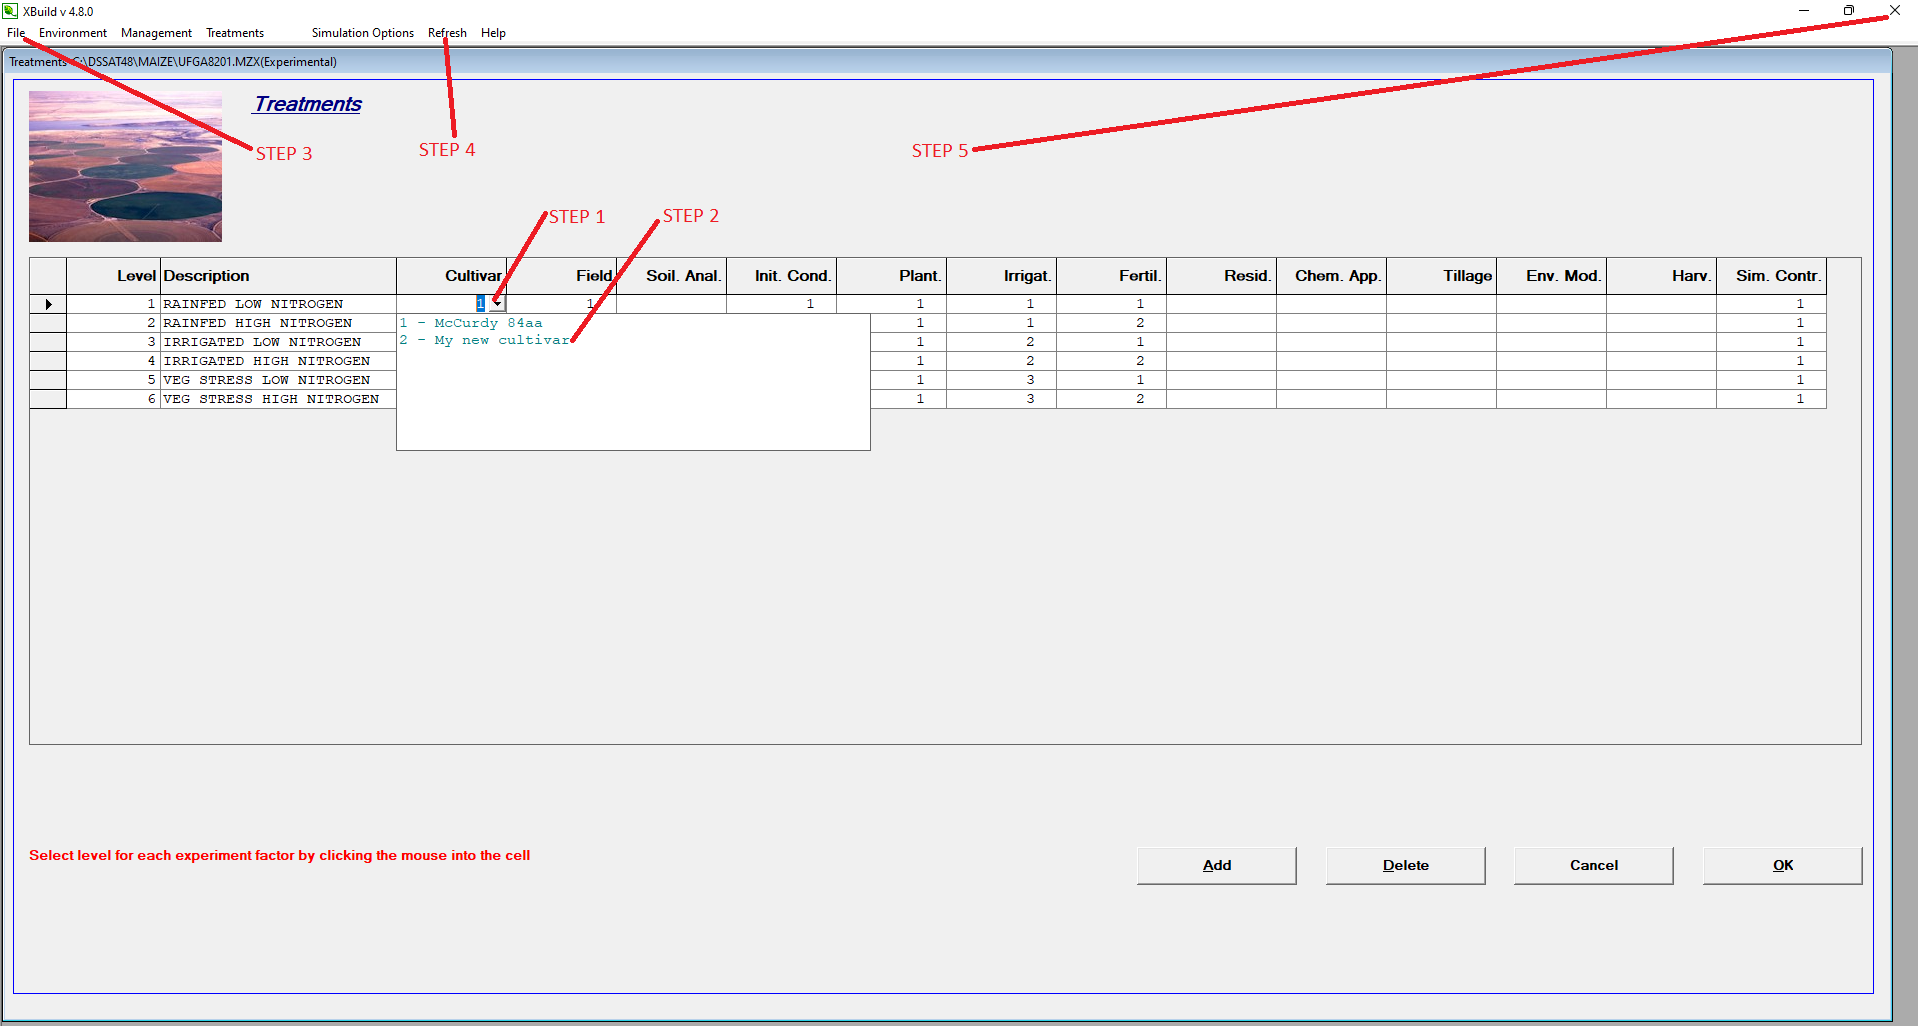
Follow the steps in Figure 8, where:
- STEP 1: Go to your treatment and click in the Cultivar drop down selector.
- STEP 2: Select your cultivar line.
- STEP 3: Save the file.
- STEP 4: IMPORTANT: Refresh the file. DO NOT SKIP THIS STEP.
- STEP4: Exit the XBUILD.
Step #9:
At this point you already add the new cultivar line into your genotype files and experimental file. The next steps is to go back in the main DSSAT Shell (Figure 1) screen and run your experiment with the new cultivar line.
If you want to know more about DSSAT please consider registering in the Upcoming DSSAT Training Workshop
That’s it! Enjoy The DSSAT!